
Putting an end to the disgusting small items that clog up your bike, but don’t dare remove them yourself – a daunting task every time you get back home. Wet weather is the perfect time to drastically rid of these loose particles, and it’s easy too – just apply a bit of a blast of water on the chain, and you’re through in minutes. A quick test ride is all it takes to wash away these annoyances, after which the chain and its parts can be safely wiped clean with a soft cloth. Let’s read: bike stand for exercise.
How to deep clean a road bike?

Step 1: Remove the main chain. If it hasn’t been lubricated, apply sparingly with WD-40 grease before you do this step.
Step 2: Start by unclogging those water channels out of your cassette – there is a critical function that could always be lost if they had accumulated silt and dirt there over time (keep in mind while removing them, make sure not to lose them) Keep reading https://gothicfuturism.com/mtb-lubrication-mistakes-to-avoid
Step 3: Next comes the cassette’s corsets and their free-hanging baskets.
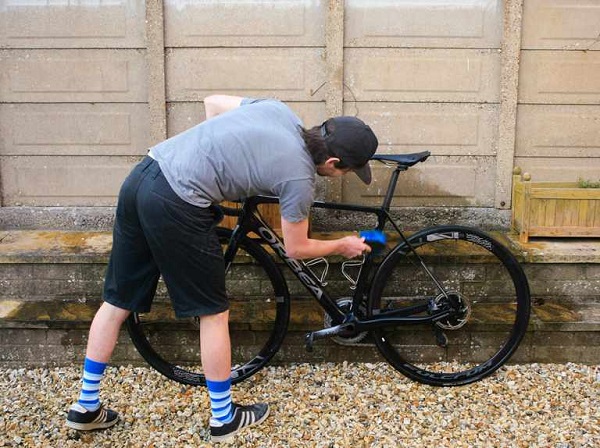
Step 4: Clean the rear derailleur cage, stem, crankset drive side chainrings with a rag that has been moistened in a fridge or freezer. You might need to use more than one round of this procedure as some parts like derailleur cages are often extremely dirty after prolonged wet weather rides – these really take some effort before they are clean.
Step 4: Now it’s time to clear out the chainrings and their free-hanging baskets (these really have some bits of grit, grime and dust caked in them). Prepare the picture again for example, by using a piece of plain paper. With your fingernail, gently scrape off any extra dirt from between the teeth – be extremely patient, as cheap chains like alloy ones tend not to need much cleaning at all.
Step 5: Now rinse away these dirt particles and grit in your bathtub or wash basin, taking care to make sure to thoroughly clean the tight single cage on each chainring, too (you should use a disposable plastic bag when rinsing as you don’t want any of them dropping into the tub – have some cotton waste water bags ready). Be extremely careful that none of this extra junk is left behind inside your concrete rim cogs’ (the main bearings) basket and don’t get any of it touching the steel liner. If something does touch, you could destroy your rim’s aluminum with rust within minutes – though most people aren’t unlucky enough to risk their latex bicycle rims in this kind of situation!
Step 6: Now, re-stamp all those parts that have been cleaned and make them ready for lubrication again. You should apply some light coating of new grease to the bearings and make this easy-gritting by dusting with some fine wet graphite ‘graphite powder’ or oil that contains micronized graphites.
You should also remove dirt from the external steel parts (like those on your wheel spokes) again before applying any lubricant here, too if you want them last a long time. Do not forget about these either. Check up again in several months once the wet weather (grass season) starts and check that all these tools don’t start rusting, yuck. This stone dust is not good to be around for any bike’s parts. The whole idea of doing it right the first time should also mean that you know what your bike will look like when put on display inside the garage next autumn too!
Step 7: At no point in any chainring or cogs lubrication jobs must you use the chain covers! They will have wide exposed metal parts that can easily be damaged and marred by grease splashes.
As for rear wheel drive systems, you do not need to lubricate every single cog with lube when re-using your old (possibly creaking) bikes cable, but I would still make sure that everything looks clean as a whistle before trying any other operation on these heavy machines so why did we just put such big stress on the rear derailleur gears.
Step 8: Now, this is a bit difficult. We need to find out if our bikes will be used for real cycling again or just going downtown and sitting still in your bike stand around when it rains.
Look at that frame! It was never bent before – don’t try it yourself with aluminum-framed road racing frames unless you know what you’re doing!
Things to consider before cleaning a road bike
– The frame material will determine how dirty it needs to be cleaned
– Steel frames may need a light coat of oil before cleaning and rust removal
– Fibreglass or carbon fiber bikes should not be cleaned at all as the resin used in these materials can damage them. A certain amount of cleaning may be ok, but any more, especially with a damp cloth, usually will cause some serious damage and void your warranty.
– The mudguards should not get much dirt on them as it can make scratch marks. – Do not forget to keep the amazon frisbee!
– A lot of the dirt on the top tube and some parts of the frame is polished off with a wire brush. I will not recommend using them again because they may damage your bike if that scratch can be found once you start riding it away from home
– Check the runout (traction), especially in wheels components, to avoid any problems when cleaning! – You need to watch if there are brake cables or wires overhanging somewhere as this can be both a danger and a pain!
– If you do not want to deal with the moving parts inside your seat post, make sure that it has been fitted in for good, then tighten them up again afterward. It is possible this could lead to some problems, especially when tightening cables which should always be done by a professional bike mechanic.
Conclusion
The dirt that builds up on your bike is a result of two things: sweat and mud. Sweat is inevitable; there’s nothing you can do about it. But if you want to get rid of the mud, then you need to be more careful about how you wash your bike. If your frame gets dirty, take a damp cloth and wipe it down, but if the bike has gotten muddy because of puddles or rain, then use a sponge or brush to clean it off.