
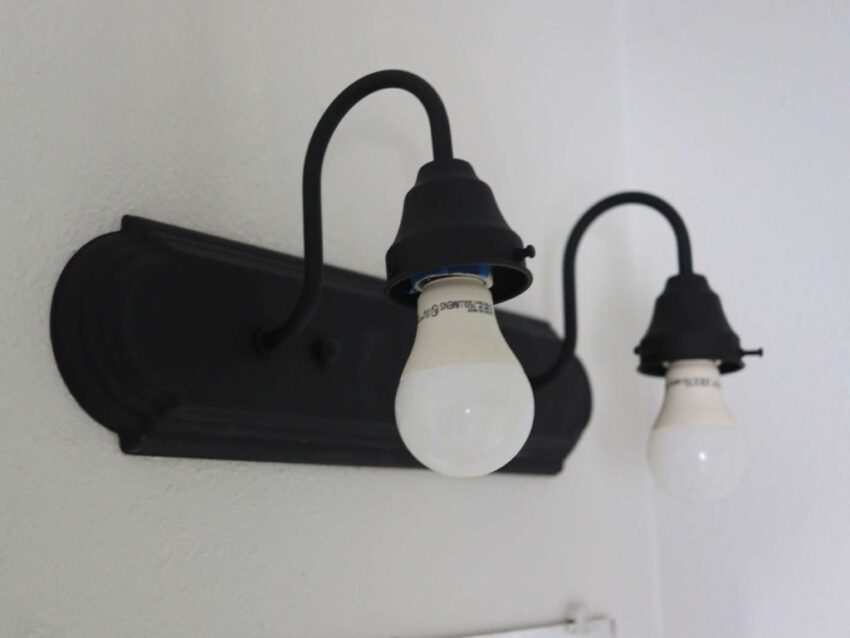
Are you tired of the outdated look of your bathroom light fixtures? Are you searching for a cost-effective way to upgrade your bathroom’s aesthetics? Look no further than spray painting your bathroom light fixtures! This simple and creative solution allows you to transform the appearance of your fixtures without breaking the bank. In this article, we will guide you through the process of spray painting bathroom light fixtures, covering everything from preparation to final installation. Get ready to give your bathroom a refreshing upgrade!
Understanding the Benefits of Spray Painting Bathroom Light Fixtures
Certainly! Spray painting your bathroom light fixtures can be a cost-effective and customizable way to give them a fresh new look. By understanding the step-by-step process, you can achieve a professional-looking result. However, before we delve into the process, it’s important to note that there are pros and cons to using spray paint and alternative options such as cork spray. It may be worth exploring the cork spray pros and cons before deciding on the best approach for your bathroom light fixtures.
Preparing the Bathroom Light Fixtures for Spray Painting
Cleaning the Fixtures
The first step in preparing your bathroom light fixtures for spray painting is to ensure they are clean and free from any dust, grime, or grease. Start by removing the fixtures from their mounting brackets and carefully clean them using a mild detergent or soap. Scrub gently to avoid scratching the surface. Rinse thoroughly and allow the fixtures to dry completely before proceeding to the next step.
Sanding the Surfaces
To achieve a smooth and even finish, it’s important to sand the surfaces of the fixtures. Use fine-grit sandpaper to lightly sand the fixtures, focusing on areas with existing paint or rough surfaces. The goal is to create a slightly rough texture to help the paint adhere better. After sanding, wipe away any residual dust with a clean cloth.
Applying Primer
Applying a primer is a crucial step in ensuring the longevity of your spray paint job. Choose a primer specifically designed for the material of your fixtures (metal, plastic, or glass). Apply an even coat of primer to the fixtures, allowing it to dry according to the manufacturer’s instructions. The primer will create a smooth surface for the spray paint and enhance its durability.
Choosing the Right Spray Paint for Bathroom Light Fixtures
When selecting spray paint for your bathroom light fixtures, consider the material they are made of. This will help you choose a paint that adheres well and provides optimal results.
Considerations for Metal Fixtures
If your bathroom light fixtures are metal, look for spray paints specifically designed for metal surfaces. Opt for paints that offer rust protection and durability. Metallic finishes can add a touch of elegance, while matte or satin finishes create a modern look. Consider the overall color scheme of your bathroom when choosing spray paint.
Considerations for Plastic or Glass Fixtures
For plastic or glass fixtures, choose spray paints formulated for these materials. Look for paints that offer excellent adhesion and durability on non-metal surfaces. Glossy finishes can give a sleek and polished appearance, while frosted or translucent finishes create a softer ambiance. Consider your bathroom’s existing color scheme and lighting conditions when selecting the appropriate spray paint.
Techniques for Spray Painting Bathroom Light Fixtures
Now that your fixtures are prepped and you have the right spray paint, it’s time to apply the paint and achieve a professional-looking finish. Follow these techniques for optimal results:
Using Even Strokes
Use smooth and even strokes to ensure consistent coverage when applying spray paint. Hold the can about 6-8 inches away from the fixture. Start spraying slightly before the fixture and continue spraying steadily across the surface. Avoid stopping abruptly to prevent uneven layers of paint.
Maintaining Proper Distance
Maintain a consistent distance between the spray paint can and the fixture throughout the application process. This distance ensures an even paint distribution and prevents excess buildup or dripping. If you get too close, the paint may become thick and create runs, while being too far may result in a patchy finish.
Applying Multiple Coats
To achieve a vibrant and long-lasting finish, applying multiple thin coats of spray paint rather than a single heavy coat is important. Allow each coat to dry before applying the next one. This approach ensures the paint adheres well and provides a smooth, professional finish.
Drying and Curing the Spray Paint
After applying the final coat of spray paint, it’s crucial to allow sufficient drying time before reinstalling the light fixtures. Follow the manufacturer’s instructions regarding the drying time, as it may vary depending on the spray paint used. Once the paint has dried, it’s recommended to cure it for optimal durability. Curing involves exposing the paint to heat, either by using light fixtures or a low-heat setting on a hairdryer. This process enhances the paint’s resilience and helps it withstand moisture and frequent use.
Reinstalling the Light Fixtures
Once the spray paint has dried and cured, it’s time to reinstall the light fixtures in your bathroom. Follow the manufacturer’s instructions or consult a professional if needed. Ensure that all electrical connections are secure and the fixtures are mounted properly. Step back and admire your refreshed bathroom space with its newly transformed light fixtures!
Maintenance Tips for Spray-Painted Bathroom Light Fixtures
To maintain the appearance and longevity of your spray-painted bathroom light fixtures, follow these maintenance tips:
- Clean the fixtures regularly with a soft cloth or sponge.
- Avoid using harsh chemicals or abrasive cleaners that may damage the paint finish.
- Be cautious while changing light bulbs to prevent scratching or chipping the paint.
- If the paint starts to peel or show signs of wear over time, consider touching up the affected areas with matching spray paint.
- Enjoy your updated bathroom ambiance and the cost-effective transformation you have achieved!
Conclusion
Spray painting your bathroom light fixtures is a creative and cost-effective way to upgrade the look and feel of your bathroom. By following the steps outlined in this article, you can transform outdated fixtures into stunning focal points. Remember to choose the right spray paint for your fixtures, apply multiple thin coats, and allow sufficient drying and curing time. With proper maintenance, your spray-painted light fixtures will provide a refreshed and inviting ambiance for years to come. Enjoy your newly transformed bathroom!
You may like to read How to Clean a Prada Nylon Bag