
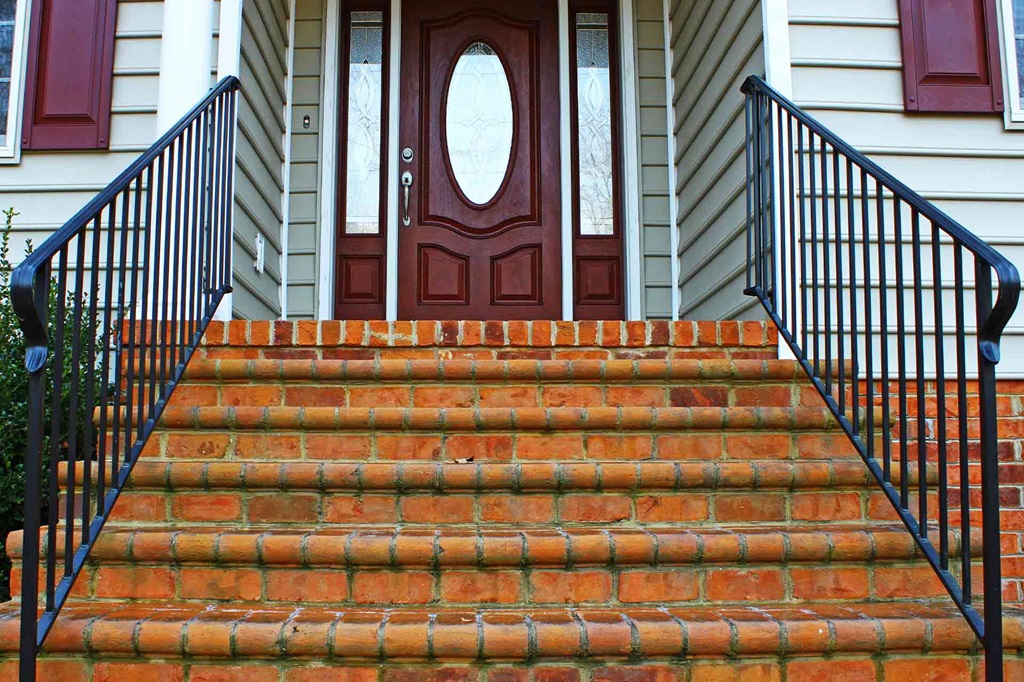
A set of brick steps leading up to your front porch can add beauty and charm to your home’s exterior. Brick is a classic material that looks great against many architectural styles. Installing brick steps yourself can save on labor costs compared to hiring a professional, and the end result will be a custom project you can take pride in.
With the right preparation and materials, building front porch brick steps is an achievable DIY project for an intermediate to advanced DIYer. Follow this guide to learn the ins and outs of planning and constructing your own brick front porch steps.
Things to Consider Before Building Front Porch Brick Steps
Before diving into the building process, take time to think through your project and make some key decisions. This planning will ensure your finished steps suit your space and needs.
Step Design and Layout
Consider the rise and run of your steps. The rise is the height of each step while the run is the depth. A good standard ratio for rise and run is around 6:11. For example, steps with a 6 inch rise (height) would have an 11 inch run (depth). Make sure your rise and run comply with local building codes.
Also factor in the overall length and width of the steps. Measure the porch deck height to determine how many steps you need. The width should match the width of your porch or entryway. Platform steps are wider, while straight steps are narrower.
Decide on a step shape. Rectangular steps are most common, but you could also do curved or L-shaped steps. The shape you choose impacts the layout and brickwork technique.
Consider the look you want. Steps with open risers have gaps between steps while closed riser steps have a solid vertical surface. Both styles have pros and cons.
Materials
Brick type matters when it comes to durability and appearance. Choose clay fired brick for longevity or concrete brick for affordability. Red brick has a traditional look but you can also choose earth tone, gray, brown or multi-colored blends.
You’ll also need these materials:
- Mortar mix
- Concrete and gravel for the footing
- Concrete bonding agent
- Rebar for reinforcement
- Landscape fabric for a base
- Sand for the joints between bricks
Tools Needed
Assembling the right tools will make installing brick steps much smoother. You’ll need:
- Shovel
- Hoe
- Level
- Trowel
- Joint rake
- Chalk line
- Mason’s string
- Circular saw with concrete blade (for cuts)
- Personal protective equipment like gloves, goggles, ear protection, etc.
Skill Level
Bricklaying takes some skill and construction know-how. If you’re new to masonry work, simple rectangular steps are a good starter project. More complex shapes or patterns require more expertise. Be sure to follow all safety practices when using power tools and materials like concrete.
How to Build Brick Front Porch Steps
Once you’ve made all the pre-build decisions, it’s time to start construction. Follow these steps:
Step 1: Build the Footing
The footing provides a stable base for your steps. Dig at least 12 inches down and clear the area of debris.
Form the footing using lumber held in place by stakes. Make it 6-12 inches wider on each side than the steps.
Fill with concrete mixed with gravel and rebar for reinforcement. Check its level before the concrete dries.
Let the concrete fully cure for a few days before building on top.
Step 2: Prepare the Ground
Clear the walkway area of any grass, roots or stones. Create a 4 inch gravel base, compacting it down. This improves drainage.
Roll out landscape fabric over the gravel as a moisture barrier. Have it extend a few inches past the footing edges.
Level the area completely so your steps don’t end up uneven.
Step 3: Build the Side Brick Walls
The two side walls contain the steps between them.
Set up Mason’s string along the sides to guide your brick placement.
Dry lay a row of bricks along each side. Space them evenly to divide up the rise (height) of each step.
Once they’re positioned correctly, apply mortar and lay the side bricks permanently, checking level frequently.
Step 4: Install Weep Holes
Weep holes allow moisture to drain from inside the brick walls, preventing damage.
Use a circular saw with a concrete blade to cut holes in the side walls every 2 feet. Space them one brick above ground level.
Fill each hole with gravel before continuing.
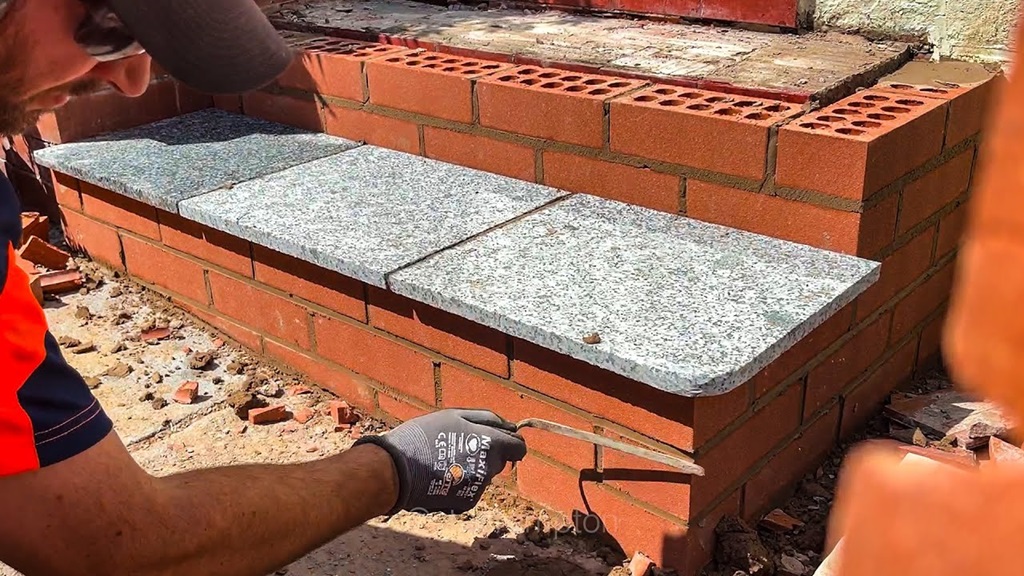
Step 5: Add the Step Treads
Now you’re ready to install the horizontal stepping surfaces.
Apply concrete bonding agent to the top of the side walls where the steps will sit. This creates adhesion.
Dry lay the step tread bricks in place so they overhang the riser bricks below by about an inch.
Mark cutting lines, then remove and cut bricks to fit using a circular saw.
Mortar the steps in place one at a time, maintaining level. Ensure they sit firmly on the bonding agent.
Check that steps don’t rock and are supported at the corners. Use brick chips to shim any gaps if needed.
Step 6: Install Riser Bricks
Riser bricks are the vertical part between step treads.
Cut riser bricks to height so they fit snugly between treads. Mortar in place.
Close off open risers with cuts of bricks and mortar if desired for a clean look.
Step 7: Finish the Joints
Let the mortar dry partially. Then use a joint rake to smooth the joints and create lines.
Sweep sand into the joints to fill. Spray any excess sand off with water.
The sand gives a nice finished look once solidified. Let dry completely.
Seal the bricks and joints using an exterior grade sealant. This prevents damage from moisture. Reapply sealer yearly.
And that concludes the main steps for installing brick steps! Now admire your handiwork and the new beauty they bring to your home’s curb appeal.
Tips for Achieving Quality Results
Follow these tips to ensure your brick steps turn out looking and functioning great:
- Always wear proper safety gear when cutting bricks or using power tools. Eye and ear protection are essential.
- Check for level frequently as you work. Stop to re-level any sections that are off to prevent major issues down the line.
- Don’t rush through the mortaring process. Let initial applications dry partially before adding more layers.
- Blend bricks from multiple pallets when building side walls to mix up the colors and patterns for a natural varied look.
- Alternate the direction of the step treads from one step to the next for structural integrity.
- Stop work and cover unfinished sections with plastic sheeting if rain is expected so the mortar doesn’t wash out.
- If not building right away, cover the completed footing with plywood to protect it.
- Inspect your steps yearly and re-seal cracks or deteriorated sections promptly to prevent worse damage.
Enhancement and Decoration Ideas
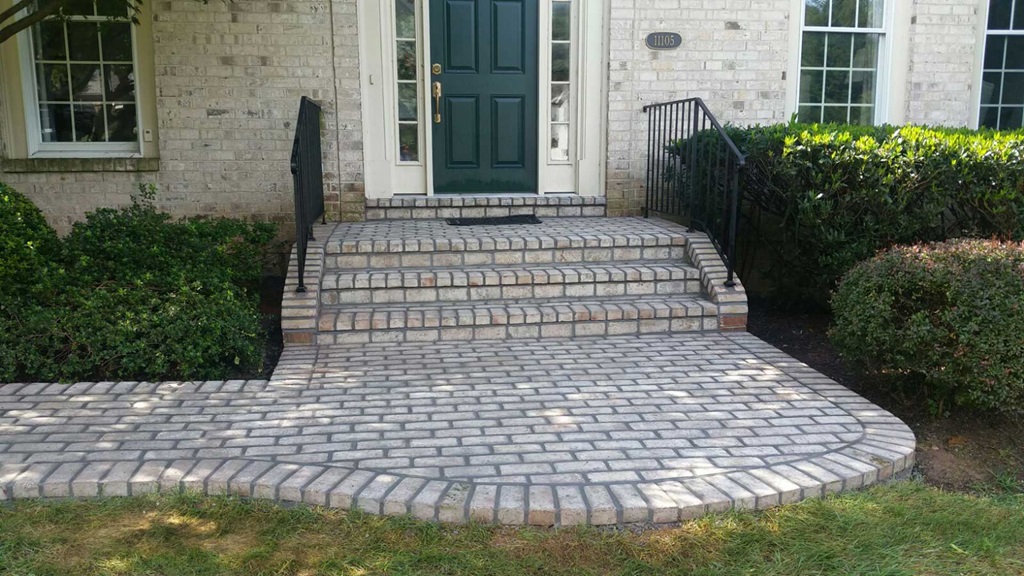
Plain brick steps look great on their own, but you can enhance them even further:
- Add a brick or stone border along the sides for decorative flair.
- Use patterned or special shaped bricks on the risers to showcase them.
- Top off the side walls with attractive coping caps made of bluestone or granite.
- Install lighting such as step lights or lanterns to improve visibility and ambiance at night.
- Add plantings around the steps in planters, pots, or a landscape bed.
- Personalize your steps by incorporating initials, meaningful words, or mosaic designs.
- Stain or tint the bricks before installation for bold, lively hues.
So explore your creative options! Accent details can give your steps real curb appeal.
Final Thoughts
Installing a custom set of brick front porch steps takes time, planning, and hard work. But the lasting beauty and charm they add to your home makes it well worth the effort. Not only do front porch brick steps increase your curb appeal, they also add value to your property.
Just be sure to educate yourself on proper bricklaying techniques before beginning. Proper preparation of the base and sub-grade are also critical to support the steps. But once complete, you’ll have an eye-catching feature to welcome guests for decades to come. Enjoy your new brick steps!
FAQs
How much does it cost to build brick steps?
Brick step costs range from $25-$100 per square foot depending on brick type, pattern complexity, labor, and other factors. So for a small set of steps roughly 30 square feet, expect $750-$3000 total.
What kind of mortar should I use?
Use type N or type S mortar which offer high strength and flexibility to withstand freeze/thaw conditions outside. Don’t use basic type O mortar which is best for indoor projects.
What maintenance is needed for brick steps?
Outdoor brick requires minimal maintenance. Sweep debris regularly, check for cracks or damage annually, re-seal as needed, and apply exterior grade brick cleaner if they become dirty over time.
How long will brick steps last?
Properly built brick steps can easily last 50+ years. Quality materials, proper installation, and maintenance are key to longevity.
Should I hire a pro or DIY my brick steps?
With sufficient DIY skills, these steps can be a great hands-on project. But for complex designs or if you’re unfamiliar with masonry, hiring a professional installer is recommended.