
Is your bathtub drain clogged or leaking? Fortunately, replacing a bathtub drain is a relatively simple DIY project that can save you significant money on plumber fees. To return a bathtub drain, you must remove the old drain and install a new one.
This can typically be done with essential tools and basic plumbing knowledge. With the right approach, you can easily replace your bathtub drain and restore your bathtub to proper working condition. With some essential tools and a little know-how, such as bathtub drain removal, you can have your bathtub drain working again in no time.
When to Replace a Bathtub Drain
There are a few signs that indicate it’s time to replace your bathtub drain:
- The drain is very slow or completely clogged. No amount of drain cleaner or snaking can clear the clog.
- A persistent leak is coming from the drain area, even when the drain is fully closed.
- The drain cover is missing, broken, or otherwise damaged.
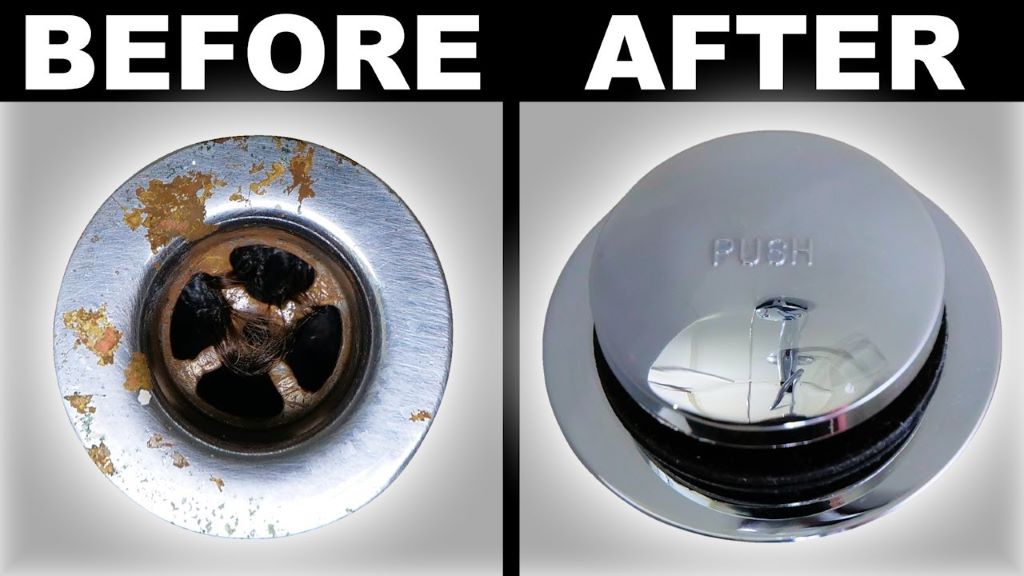
- You see rust around the drain area, indicating corrosion.
- The existing drain does not match the rest of your newly remodeled bathroom.
If you notice any of these issues, your bathtub must have a new drain installed. Replacing the drain is often easier and cheaper than repeatedly snaking or repairing an old drain.
Gather the Necessary Materials
Before starting this project, you’ll need to gather the following materials:
- Adjustable wrench
- Plumber’s putty
- Screwdriver
- Pipe wrench
- Replacement bathtub drain kit (either plastic or metal, with stopper and overflow plate)
- Teflon plumber’s tape
- Bucket
- Old rags or towels
Ensure you purchase a drain kit explicitly designed for bathtub applications, not sink drains. Bathtub drains have a more comprehensive overflow plate. Take the old drain with you to the hardware store to ensure you get a suitable replacement.
Shut Off the Water Supply
The first step is always to turn off the bathtub’s water supply. There should be shut-off valves under the tub or nearby. Turn the hot and cold knobs clockwise to shut off the water.
Turn on the faucet to release any pressure in the pipes. When the water stops flowing, the lines are depressurized and safe to work on.
Place a bucket under the tub drain to catch any remaining water or leaks once you unscrew the drain. Have some rags or towels handy to soak up water as well.
Remove the Old Drain
With the water supply off and a bucket in place, you can start removing the old drain:
- Use a screwdriver to pry off the drain cover plate around the stopper. Remove the stopper mechanism as well.
- Use channel lock pliers or a pipe wrench to unscrew the drain tailpiece counterclockwise slowly. It will likely be stuck with the plumber’s putty or old silicone.
- Once loosened, unscrew the tailpiece entirely and pull it out from above, along with the entire drain assembly. Place the old pieces in your bucket.
- Use a wrench to loosen and unscrew the drain basket inside the tub, opening counterclockwise. Pull out the basket and any old plumber’s putty.
- Thoroughly clean the tub drain hole with a rag to remove all old putty residue. Scrub with a wire brush if needed.
The tub drain hole should be evident and ready for the new drain installation.
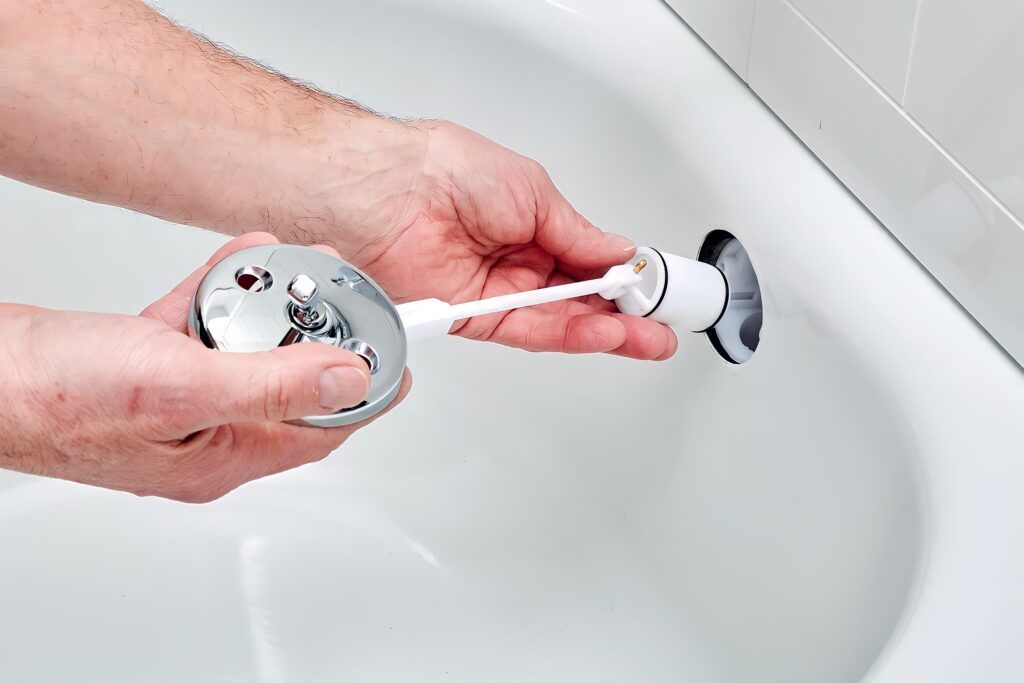
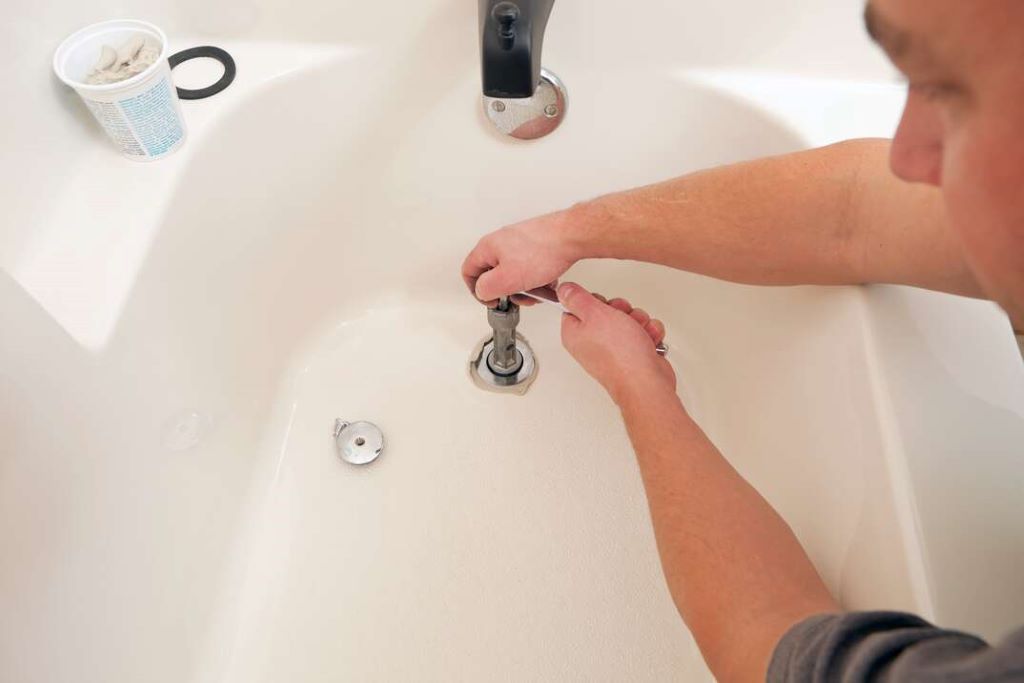
Install the New Drain Assembly
Follow these steps to install your new bathtub drain properly:
- Apply the plumber’s putty around the new drain basket threads and underside flange. Insert the basket into the drain hole and press firmly in place.
- Reach inside the tub and screw in the basket clockwise with a wrench to secure it into place. Tighten thoroughly to prevent leaks. Wipe away any excess putty.
- Wrap the plumber’s tape around the new drain tailpiece threads in a clockwise direction. This will create a watertight seal.
- Attach the tailpiece to the underside of the basket from below the tub. Tighten by hand first and then fully tighten with a wrench.
- Place the new stopper mechanism into the opening at the bottom of the tailpiece.
- Apply the plumber’s putty around the underside of the new drain cover plate. Press into place on top of the tailpiece opening.
- Reinstall the new stopper control rod through the drain plate. Attach any lift rods and control arms that came with your drain kit.
- Seal gaps around the drain plate with additional plumber’s putty if needed. Allow the putty to fully dry.
With the new bathtub drain fully installed, you can turn the water supply back on and test for leaks!
Tips for a Watertight Drain
Here are some extra tips to ensure your new tub drain is leak-free:
- Use plenty of plumber’s putty under the drain basket and cover plate. Pack it into place before tightening everything down.
- Wrap Teflon tape around pipe threads clockwise for a watertight seal. Go around at least three times.
- Hand-tighten connections first before taking a wrench to them. Over-tightening can crack porcelain tubs.
- Allow the plumber’s putty to dry thoroughly before using the tub. Drying time is usually 24-48 hours.
- Run water into the tub from the faucet with the drain fully closed. Check below for any drips or leaks.
- Consider using transparent silicone caulk around the drain cover plate for an extra seal.
Replacing a bathtub drain is one of the handiest DIY projects for homeowners. Following these steps and tips will help you install a new drain that will last for years before it needs replacing again. Just take your time and watch for leaks.
FAQs
How do I know if my bathtub drain is leaking?
Check for any water puddling on the floor around the tub when not in use. Leaks usually occur at the drain baskets or connections. Running water into the tub with the drain closed will reveal leaks below.
What tools do I need to replace a tub drain?
Adjustable wrenches, channel locks, screwdriver, wire brush, bucket, rags, plumber’s putty, and Teflon tape. No power tools are needed.
Can I replace just the drain stopper?
You can replace just the stopper or control arm if needed. But if the drain basket or tailpiece assembly is faulty, replacing the entire drain is best.
How long does it take to replace a bathtub drain?
An experienced DIYer can replace a tub drain with the proper tools and materials in 1-2 hours. Allow for additional putty drying time before using.
What type of new drain should I buy?
Look for a drain kit rated for bathtub application. The overflow plate will be larger than a sink drain. Match the finish to your existing hardware.
Conclusion
Replacing a worn or damaged bathtub drain is a straightforward project that most homeowners can tackle in just a few hours. With some essential tools, a new drain kit, and the proper techniques, you can save the cost of calling a plumber. When tackling the task of cleaning a sink drain, ensure a thorough job by following essential steps. Just be sure to shut off the water supply, remove the old drain carefully, and install the new drain assembly using plumber’s putty for a watertight seal. Go slowly, watch for leaks, and your “new” tub drain should last for many years before it needs replacing again!