

Picture this: snowflakes dance under a canopy of twinkling lights, turning your backyard into a winter wonderland. Families gather, laughter echoes, and the magic of the season comes alive. Yet, setting up holiday lights often feels like a chore. Enter waterproof rope lights with remote control. These flexible LED strips resist rain and snow, perfect for outdoor displays. They save energy too. According to the U.S. Department of Energy, LEDs use up to 90% less power than old incandescent bulbs. Plus, the Consumer Product Safety Commission notes about 160 daily injuries from holiday setups, but smart choices like these reduce risks. One popular option is the waterproof rope lights that offer reliable performance. This guide walks you through installation, so you create dazzling decor effortlessly.
Why Choose Waterproof Rope Lights for Holiday Displays
Waterproof rope lights stand out during holidays. They handle wet weather without flickering out. Moreover, their slim design hugs curves and edges smoothly. You gain versatility for patios, trees, or fences. Additionally, built-in remotes let you switch colors from afar. No ladders needed mid-party.
These lights boost curb appeal. Neighbors notice the glow. Friends compliment the setup. However, energy savings impress most. LEDs last 25,000 hours or more, per industry standards. That means fewer replacements year after year. Furthermore, they stay cool to the touch, cutting burn risks.
Consider safety first. The National Fire Protection Association reports over 800 annual home fires from decorations. Waterproof models minimize electrical hazards. They seal connections tightly. Thus, you focus on joy, not worries.
Essential Materials for a Seamless Setup
Gather tools before starting. This prevents mid-project trips to the store. First, pick your rope light kit. Look for IP65 rating or higher for true waterproofing. Next, grab mounting clips. Plastic ones work indoors; metal suits outdoors.
You need a power adapter too. Match voltage to your strip length. Extension cords help reach far spots. Scissors cut precisely at marks. Finally, include zip ties for extra security.
Don’t forget the remote batteries. Fresh ones ensure smooth operation. Gloves protect hands from clips. A ladder reaches high areas safely. With these, installation flows quickly.
Planning Your Holiday Lighting Layout
Start with a sketch. Walk your space. Note outlets and obstacles. Decide on straight lines or loops. For example, outline your roofline for classic charm.
Measure twice. Add 10% extra length for bends. This avoids shortages. Additionally, test the remote range. Stand where you’ll control it most.
Think themes. Warm whites evoke coziness. Multicolors spark fun. However, blend with existing decor. Holiday rope lighting ideas often mix steady glows with twinkles.
Consider power needs. Group lights to one outlet if possible. Overloading circuits sparks issues. Thus, plan plugs wisely.
Step-by-Step Guide to Installing Waterproof Rope Lights
Follow these steps carefully. Each builds on the last. You achieve professional results at home. Safety comes first, always.
Step 1: Prepare Your Installation Area
Clear the space. Remove old decorations gently. Sweep debris away. Clean surfaces with mild soap. Dry them thoroughly. Moisture traps dirt under clips.
Check weather. Pick a dry day. Rain complicates things. Additionally, unplug nearby power sources. This prevents shocks.
Lay out the rope light. Unroll fully. Let it warm to room temperature. Cold makes it stiff. Now, you’re set.
Step 2: Cut and Connect the Rope Lights
Locate cut marks. Every two feet, usually. Snip straight with scissors. Avoid fraying wires.
Attach end caps. These seal exposed ends. Waterproofing depends on tight fits. Next, connect sections. Use included couplers. Twist firmly.
For longer runs, add power injectors. They boost signal midway. However, follow kit limits. Overextending dims lights.
Step 3: Mount the Lights Securely
Position clips every 12 inches. Space evenly for tension-free hangs. Screw into wood or use adhesive for stone.
Thread the rope through clips. Pull gently. Secure with zip ties if windy. Start from power source outward. This eases testing.
For ground installs, stake down. Bury slightly under mulch. Thus, it blends naturally.
Step 4: Wire to Power and Test Functionality
Plug into the adapter. Route cords safely. Use covers for outdoor plugs. Ground fault interrupters add protection.
Turn on power. Lights should glow steadily. Now, grab the remote. Cycle through modes. Adjust brightness.
If issues arise, check connections. Wiggle gently. Most glitches fix easily.
Related: What is the Best Rope for Cable Pulling?
Mastering the Remote Control for LED Strips
Remote control LED strips elevate your setup. Press a button for color shifts. Timers automate dusk-to-dawn cycles. Moreover, dimming saves energy during quiet evenings.
Pair the remote first. Hold close to the receiver. Press sync button. A flash confirms link. Range reaches 30 feet typically.
Customize scenes. Steady for dinners. Flash for parties. Holiday rope lighting ideas shine here. Sync with music if advanced models allow.
Store the remote wisely. A hook near the door works. Batteries last months with light use. Replace promptly for reliability.
Troubleshooting Common Installation Hiccups
Lights flicker? Inspect connections. Loose wires cause this. Tighten couplers. Additionally, check power supply. Faulty adapters dim output.
Remote unresponsive? Swap batteries. Clear interference from walls. Re-pair if needed. However, distance matters most.
Water leaks in? Verify seals. Reapply silicone if gaps show. Prevention beats fixes.
Uneven glow? Redistribute clips. Sags create shadows. Straighten gently. These tweaks restore perfection.
Creative Holiday Rope Lighting Ideas to Inspire You
Unleash imagination with these setups. Rope lights flex into shapes easily. Start simple, then experiment.
Wrap trees tightly. Spiral from trunk to tip. Warm glow mimics fireflies. Guests adore the effect.
Outline windows. Form stars or wreaths. Multicolor modes add cheer. Moreover, it frames views beautifully.
Line pathways. Stake low for safe steps. Soft blue hues guide evening walks. Safety meets style.
Craft DIY signs. Bend into “Joy” or snowflakes. Hang on fences. Personal touches wow crowds.
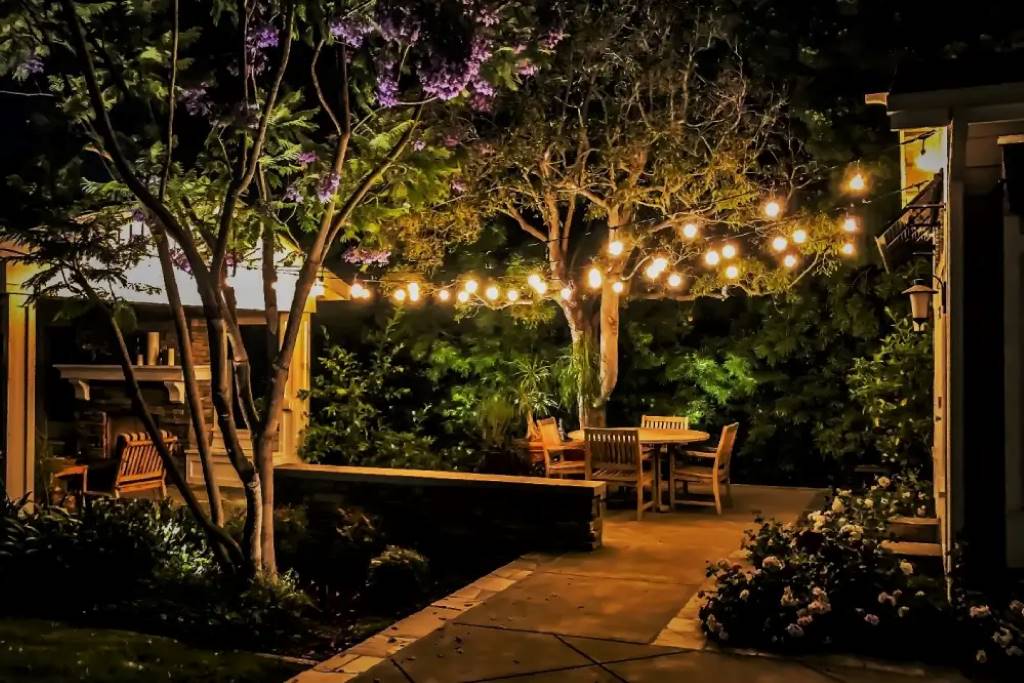
For patios, loop railings. Drape over umbrellas. Create lounging nooks. Additionally, under-table runs hide wires neatly.
Bush borders glow subtly. Tuck under edges. Green LEDs blend year-round. Versatile wins.
Roof accents highlight peaks. Run along eaves. Steady white evokes elegance. Neighbors envy the curb magic.
Indoor twists count too. Shelf outlines warm rooms. Bedroom headboards sparkle softly. Holidays extend inside.
Mix with ornaments. Dangle icicles below ropes. Layered looks dazzle. Experiment freely.
These holiday rope lighting ideas transform ordinary spots. You build traditions that last.
Maintenance Tips to Keep Lights Shining Bright
Store properly post-season. Coil loosely. Avoid kinks. Dry containers shield from dust.
Inspect annually. Look for cracks. Replace damaged sections. Early fixes prevent failures.
Clean gently. Wipe with damp cloth. Mild soap tackles grime. Never submerge powered units.
Update remotes. New batteries yearly. Firmware checks if app-enabled. Smooth operation follows.
Outdoor exposure weathers all. However, LEDs endure 50,000 hours. Rotate kits for longevity.
Share setups online. Communities swap tips. You learn faster. Joy multiplies.
Conclusion
Waterproof rope lights with remote simplify holiday magic. You save energy, enhance safety, and unleash creativity. From planning to troubleshooting, each step empowers confident setups. Now, your home radiates warmth and wonder.
Grab your kit today. Sketch a design. Install this weekend. Watch faces light up. Share your story—what idea sparks first? Start now and glow brighter.
FAQs
What Makes Rope Lights Truly Waterproof?
These lights feature sealed tubing and IP65 ratings. Silicone covers protect LEDs from splashes. Thus, rain or snow won’t short them. Always cap ends for full defense.
Can I Cut Waterproof Rope Lights to Custom Lengths?
Yes, cut at marked points every two feet. Seal fresh ends with caps immediately. This maintains waterproof integrity. Measure precisely before snipping.
How Far Does the Remote Reach for LED Strips?
Most reach 30 feet indoors. Outdoors, walls cut range slightly. Position receivers high. Clear line-of-sight helps. Test in your space.
Are These Lights Safe for Holiday Outdoor Use?
Absolutely. LEDs run cool, reducing fire risks. Grounded plugs prevent shocks. Follow load limits. The NFPA praises such choices for fewer incidents.
What’s the Best Way to Store Rope Lights After Holidays?
Coil loosely on spools. Keep in cool, dry spots. Label boxes by length. Annual checks spot wear early. Proper care extends life seasons.
References
- https://www.energy.gov/energysaver/led-lighting
- https://www.cpsc.gov/Safety-Education/Safety-Education-Centers/Holiday-Safety
- https://www.nfpa.org/education-and-research/home-fire-safety/holiday-fire-safety
- https://www.christmaslightsetc.com/pages/Rope-Lighting-Guide.htm