
A door frame is an essential part of any doorway. It provides structure and support for the door and ensures proper alignment within the wall opening. Over time, door frames can become loose or damaged due to general wear and tear, settlement of the house, or impact damage. Fixing a problematic door frame often seems like a big job, but a handy DIYer can usually accomplish it on a weekend.
In this comprehensive guide, we will walk through the entire process of repairing a door frame, from assessing the damage to securing the final repairs. You can tackle issues like sagging headers, splintered jambs, missing molding, and more with suitable materials and tools. Let’s get started!
Inspecting and Diagnosing Common Door Frame Problems

Before you can fix a door frame, you must identify precisely what is wrong with it. Some issues require complete door frame replacement, while basic repairs can address others. Carefully inspect the door frame and diagnose any problems before developing a repair plan. Do you know how to crack above the door frame?
Here are some of the most common door frame issues:
Sagging Header
Over time, the door’s weight can cause the header (the horizontal top piece) to bend or sag downwards in the middle. This leads to an uneven door that may not close or latch properly. Identifying a sagging header is easy – just sight along the length of it. If it dips down rather than being straight, it needs reinforcement.
Loose or Damaged Jambs
The jambs are the vertical pieces along the sides of the frame. If they become detached from the wall, split from screws pulling out, or develop cracks, it can destabilize the entire door frame. Check that each jamb is securely attached and structurally sound.
Missing or Damaged Trim
The decorative trim or molding around the door frame is prone to decaying, cracking, or falling off after years of paint build-up and exposure to weather. Scrutinize the trim pieces for any areas in need of repair or replacement.
Misaligned Door
The hinges likely need tightening if the door sits crooked or slants to one side. A sagging header could also cause door alignment issues. Test the plumpness of the door with a level.
Poor Fit with Wall Opening
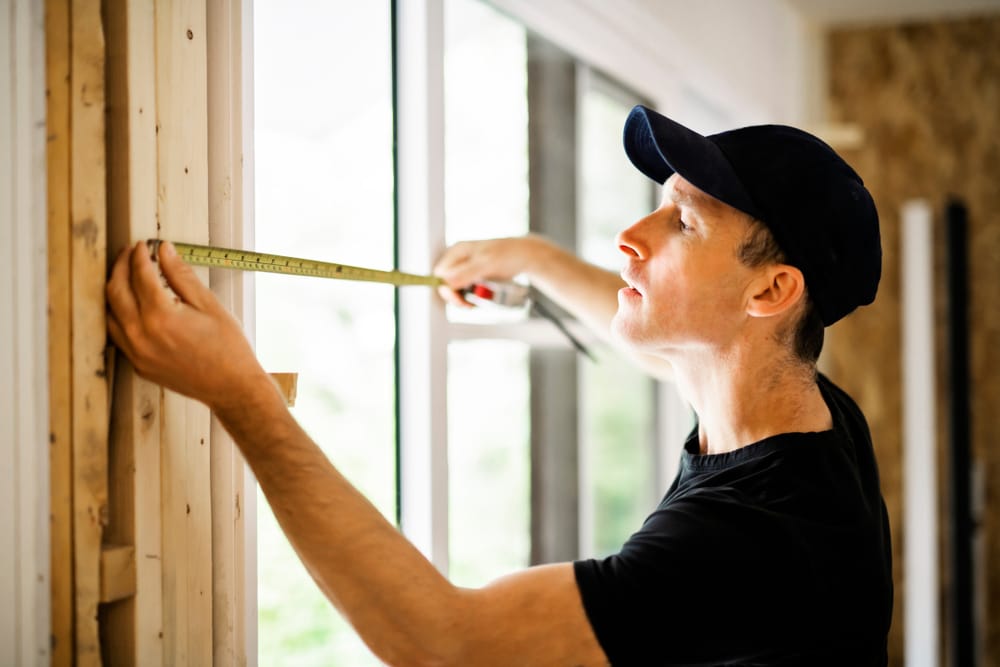
Ideally, the gaps between the door frame sides and the wall opening should be uniform. If they are uneven, the frame may have warped. Measure the gaps for consistency.
Deteriorated Door Stops
The small blocks on the jamb that the door rests against when closed (aka door stops) can wear out or fall off over time. Examine them closely to see if they need replacing.
Once you’ve identified any header, jambs, trim, door, or stop issues, you can formulate a repair plan. Some problems can be addressed individually, while others may require replacing the entire door frame for a complete fix.
Gathering Materials and Tools Needed for Repair
Now that you know what needs fixing on your door frame, gather the necessary materials and tools for the project:
Materials
- Lumber to replace damaged components – For minor repairs, purchase new jamb side pieces or header boards that match the existing size and wood type. Buy pre-hung door frames or frame kits with all included components for complete replacements.
- Wood putty, wood filler, or Bondo – For patching small holes, dents, cracks, or areas after removing old hardware.
- Wood shims – To secure the frame, wedging between the jambs and wall opening.
- Construction adhesive – For extra holding power when re-securing loose jambs or installing new header boards.
- Trim pieces – Like quarter round, door stop, or brick molding to update the look. Match the style of your old trim.
- Sandpaper – For smoothing repairs and preparing surfaces for paint.
- Primer and paint – Match the existing colors to give repairs a uniform look.
- Door stops – To replace missing or damaged stops that the door rests against.
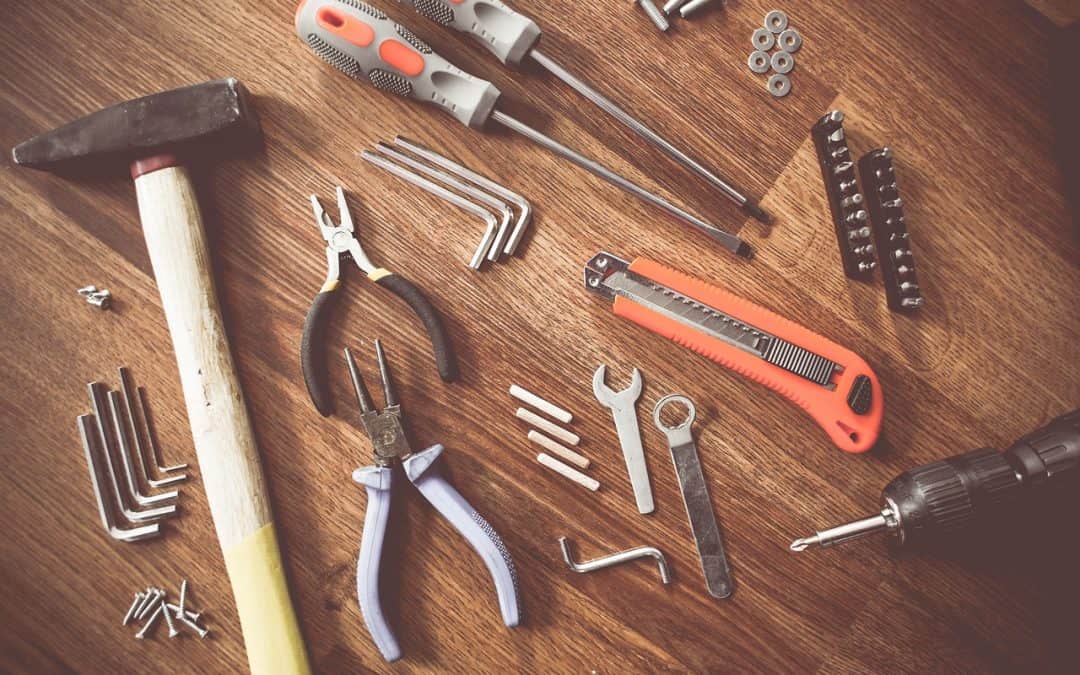
Tools
- Pry bar – For pulling off damaged trim.
- Hammer – For knocking loose stubborn nails or tapping components into place.
- Screwdriver and drill – For removing old hardware and installing new components.
- Handsaw or oscillating saw – For cutting lumber and trimming door jambs.
- Level – For ensuring door and jambs are plumb.
- Clamps – For securing header boards or new jambs in place temporarily.
- Safety gear – Like gloves, eye protection, and a respirator mask when demolishing.
With these supplies, you can fix any issue with your door frame, from minor to major repairs.
Preparing the Work Area for Repairs
Now, it’s time to start the actual door frame repairs. But before you begin demolition or disassembly, prep the surrounding work area to keep the project neat and organized:
- Remove any furniture, plants, or decor immediately around the door to provide ample working space.
- Cover nearby walls and flooring with drop cloths to protect from dust and debris.
- Take down any window treatments or door hardware like handles that could get in the way.
- Have a trash can or bag handy for discarding damaged components and wood scraps.
- Ensure you have adequate lighting for evaluating issues and the repairs themselves.
- Wear safety gear like gloves, goggles, a dust mask or respirator, and ear protection.
- Organize your repair materials and tools in one area for easy access.
Prepping the space in advance streamlines the work and contains the mess. Now, you can confidently dive into fixing that unsound door frame.
Fixing a Sagging Door Header
One of the most common door frame repairs is reinforcing a header sagging or dipping in the middle. This occurs when the door’s weight gradually takes its toll over decades. Fortunately, it’s easy to fix with some simple tools and lumber.
Follow these steps:
- Support the door temporarily with a block or prop so you can work on the header safely.
- Use a pry bar to detach the header board from the surrounding jambs. Knock out any remaining nails or stubborn bits with a hammer.
- Obliterate the sagging header and set it aside. Scrape away any old caulk or construction adhesive with a putty knife.
- Cut a new header board to the same length as the old one from a fresh lumbar that matches the thickness and depth.
- Position the new header against the jambs and check that it sits level without any sag. Clamp it temporarily in place if needed.
- Drill pilot holes through the header into the jambs. Then use finish nails or trim screws to secure the ends of the header into the jambs.
- Run a bead of construction adhesive along the top edges of the jambs and underside of the header for extra holding power.
The door should now glide smoothly with the header reinforced. Add decorative molding if desired to complete the repaired look.
Replacing Rotted or Damaged Door Jambs
If the side jamb boards become severely deteriorated or split from age or damage, replacing them entirely is the best solution. Here are the steps for this repair:
- Remove all hardware, like hinges or strike plates, from the damaged jamb with a screwdriver.
- Take out any weatherstripping or decorative trim pieces. Pry off the damaged jamb completely with a hammer and pry bar.
- Get measurements of the opening width and existing jamb depth and thickness. Transfer these dimensions onto the new jamb lumber stock.
- Clamp the new jambboard down securely to a work table. Use a circular saw or handsaw to cut it to a precise measure.
- Test fit the new jamb in the door frame opening. It should fit snugly without any gaps.
- Shim between the jamb and wall with wood shims to plumb and level the jamb. Tap shims in tightly every 16 inches along the length.
- Once positioned perfectly, drill pilot holes through the jamb and into the wall studs. Use 3-inch screws to secure the jamb firmly into the wall/studs.
- Use a utility knife to trim any excess shim length so it sits flush with the jamb edge.
Repeating this process for both jambs will result in a fully renewed frame that feels solid and operates smoothly. Handle any remaining minor repairs on existing jambs using wood filler and extra screws. With patience, new jambs can give an old door frame a new life.
Installing New Trim and Molding Around the Frame
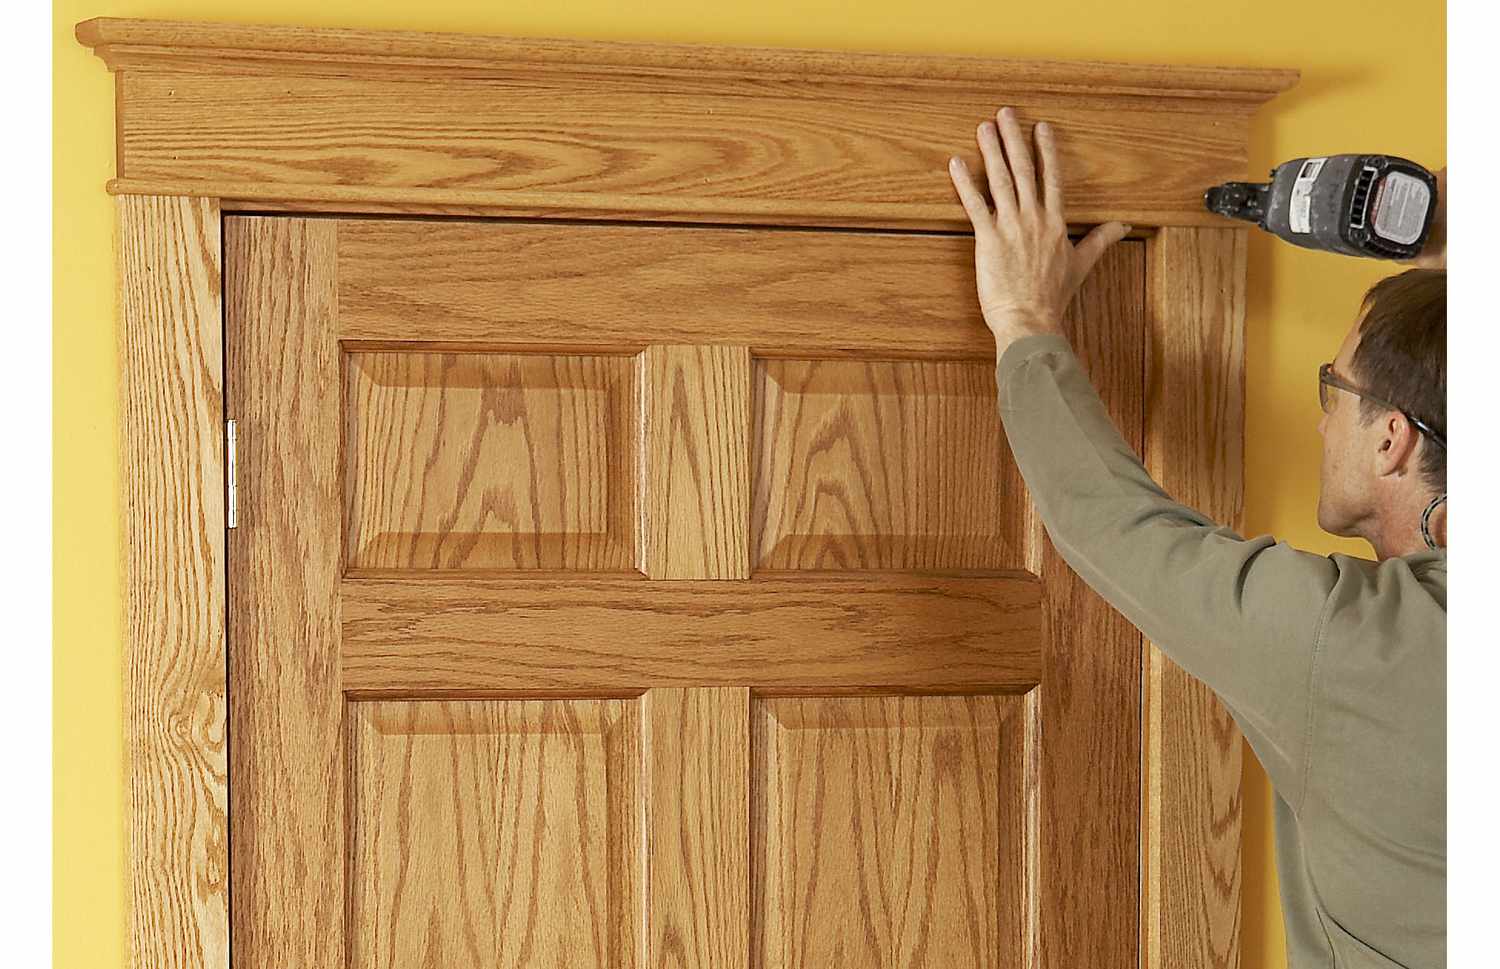
Over time, the decorative trim and molding around a door frame can become damaged, rotted, or missing. Replacing this molding is an easy cosmetic upgrade that can dramatically refresh the look of the doorway.
Here’s how to install new door trim yourself:
- Remove any existing molding or trim pieces carefully with a pry bar. Use a putty knife to scrape off any leftover caulk or construction adhesive.
- Assess the style of molding needed, such as brick molding (the outer border), door stop (attaches to the jamb), or quarter round (fills the gap between the jamb and wall). Purchase new trim boards to match whatever was original.
- Measure the length of each jamb and header area needing new trim. Cut the trim pieces to fit with a miter saw for crisp corners.
- Pre-drill holes are spaced about 12 inches apart along the backs of the trim boards. Counterbore the holes so screw heads sit flush.
- Dry fit the new molding pieces around the door frame, mitering the joints cleanly. Make any length adjustments needed for a good fit.
- Once aligned perfectly, run a bead of construction adhesive along the back of each trim piece. Press them firmly in place against the jambs/header.
- Secure the trim with the pre-drilled trim screws, taking care not to overtighten.
New trim takes a door frame from dated to stylish in a straightforward update. Combine with other repairs to completely refresh the doorway.
Securing Loose Door Jambs and Hinges
Sometimes, a door becomes crooked, sticks, or drags due to loose hardware and compromised structural integrity. Fortunately, this is one of the most straightforward door frame fixes.
Follow these steps to tighten up loose jambs and hinges:
- Support the door temporarily so it’s not hanging unevenly on the hinges. Use shims or props.
- With the weight off, tighten any loose hinge screws going into the jamb. Drill new pilot holes if the wood is splintered.
- For extra reinforcement, drive 3-inch screws through the hinges into the door frame studs behind the jamb.
- Check for any gaps between the jamb side and the wall opening. Insert tightly fitting wood shims every 16 inches and tap them in flush.
- Run a bead of construction adhesive into the gaps and along the shim edges. This will bond it all together rigidly.
- Plumb the jambs with a level. While the adhesive dries, temporarily screw, nail, or clamp them in the correct position.
- Allow the adhesive to fully cure for at least 24-48 hours before closing the door and putting weight on the hinges.
- Remove clamps and shim props. Test operation and make any final hinge tweaks so the door sits squarely.
Securing detached jambs and tightening up hinge hardware helps restore proper door function. Make these simple reinforcements part of regular door maintenance.
DIY Installation of a Pre-Hung Interior Door
In severe damage or rot throughout the frame, replacing the entire door unit with a new pre-hung door may be the most accessible. Here is a DIY pre-hung interior door installation process:
- Remove the existing damaged door and jambs in their entirety. Make the opening plumb and square by reframing if needed.
- Purchase a pre-hung interior door to fit the exact measurements of your wall opening.
- Dry fit the pre-hung door into the opening without trimming. Check the fit and make sure it is level and plumb when positioned.
- With the door in place, use shims to fill gaps between the new jambs and rough opening. Secure temporarily in place.
- Drill pilot holes through the jambs into the studs. Use long screws to anchor the pre-hung unit firmly into the framed opening.
- Use a handsaw or oscillating saw to trim any excess length from the bottom of the jambs so they sit flush on the floor.
- Install new trim and caulk edges, and seal the door perimeter to prevent air and moisture infiltration.
- Make sure the door operates appropriately and the locks function correctly. Adjust hinges if needed.
- Paint or stain the door and jambs to match the room. Add new hardware and sealants as finishing touches.
With pre-planning to get the correct dimensions, installing a new pre-hung door is straightforward. Take care to seal and secure it well for long-lasting performance.
Maintaining and Protecting Your Repaired Door Frame
To get the most extended lifespan from your repaired or replaced door frame, be sure to maintain and protect it adequately:
- Inspect annually for any new sagging, deterioration, or damage. Make repairs immediately before minor issues escalate.
- Keep the door components freshly caulked and sealed to prevent moisture intrusion that leads to rot and swelling.
- Touch-up paint as needed to protect exposed wood from UV rays and maintain aesthetic appeal.
- Consider covering high-traffic door frames with a quality metal door protector plate to prevent impact damage and dents.
- Keep hinges cleaned and lubricated for smooth operation of the door. Tighten any new loose screws right away.
- Use weatherstripping and sweeps to seal gaps around exterior doors and prevent drafts or water entry.
- Open and close the door carefully by the knobs or handles to avoid slamming it into jambs or walls.
Your repaired door frame can last for decades with attentive maintenance and protection methods while retaining proper structural integrity. Don’t neglect minor issues today that could become significant repairs tomorrow.
Frequently Asked Questions
What is the most straightforward DIY door frame repair?
The most straightforward repair is tightening loose hinge screws that allow the door to sag and bind. Tighten the screws securely into the jambs and studs. Shimming detached jambs and gluing them into place is another quick fix.
How do I fix a cracked door jamb?
For small cracks or splits in a jamb, apply wood filler compound and allow it to dry completely. Sand smooth and repaint for an invisible fix. Large cracks may require cutting out and replacing that jamb section with new wood stock.
Can I glue a broken door frame?
Yes, construction adhesives like Liquid Nails can firmly re-attach a broken jamb, stop molding, or loose header on an existing door frame. Always use additional mechanical fasteners, too, for maximum strength.
What is the best adhesive for door frames?
Polyurethane-based adhesives are best for bonding door components. Look for a product like Loctite PL Premium Polyurethane Construction Adhesive to secure new jambs or moldings to old frames. The flexible formula won’t crack or shift.
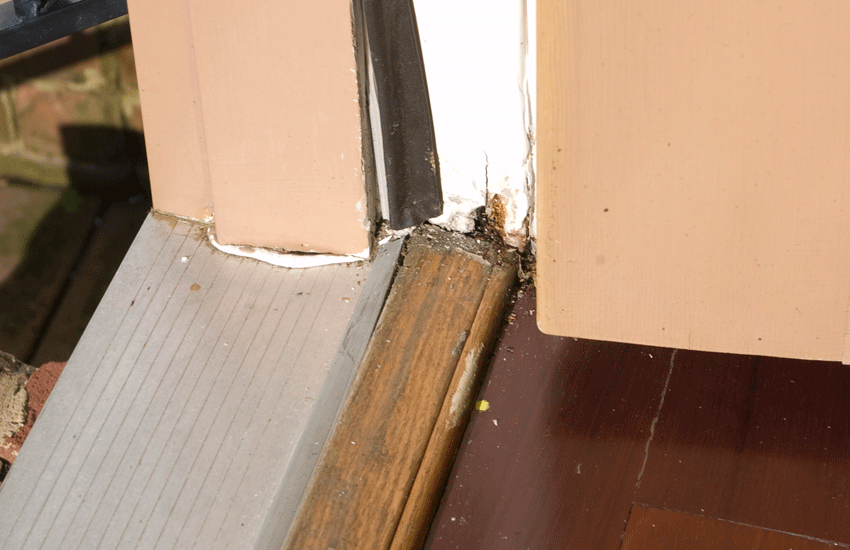
How do you fix a rotted door frame?
Cut out and remove any rotted sections entirely. Treat surrounding areas with a fungicide. Install new repair components like jambs or sills and seal them appropriately against moisture. Keeping the door components painted and caulked prevents future rot issues.
In Summary
Repairing or replacing an aging or damaged door frame brings instant improvement to the appearance and functionality of any doorway. You can tackle common issues like sagging headers, detached jambs, missing molding, and alignment problems with basic DIY skills and suitable materials.
The key is proper diagnosis of the specific issues your frame is exhibiting. Some quick fixes include tightening loose hinges, securing detached jambs with adhesive and shims, replacing worn door stops, and installing new molding. For more extensive damage like rot or splitting wood, new jambs or an entire pre-hung door kit may be required.